Introduction
Setting up product variants in Shopify is essential for any online store offering a range of options like size, color, or material. This process is integral to leveraging Shopify advanced product options and Shopify custom product options, ensuring a comprehensive and user-friendly shopping experience. Let’s dive into how you can effectively set up and manage product variants in your Shopify store.
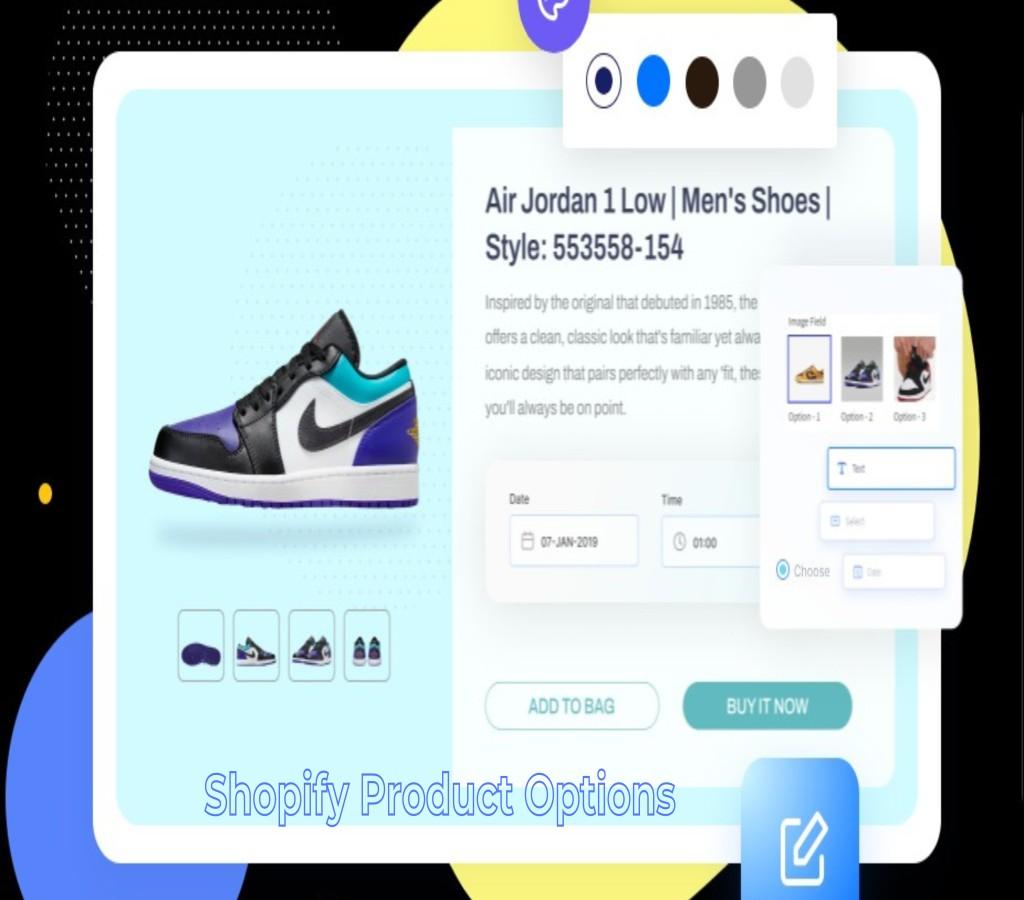
Understanding Product Variants in Shopify
Product variants are different versions of a product, distinguished by various attributes such as size, color, or material. In Shopify, each variant can have its own price, SKU, weight, and inventory level, making it a vital aspect of Shopify advanced product options.
Step 1: Planning Your Product Variants
Identify the Variants: Determine the variants you need for each product. This could include size, color, material, and more.
Organize Variant Information: Collect all necessary information for each variant, including pricing, SKU, and inventory levels, to streamline the setup process.
Step 2: Adding a Product in Shopify
Access the Products Section: Go to the ‘Products’ section in your Shopify admin and click on ‘Add product’.
Enter Product Details: Provide general details applicable to all variants of the product, such as title, description, and images.
Step 3: Adding Variants to Your Product
Enable Variants: In the ‘Variants’ section, check the ‘This product has multiple options’ box.
Input Variant Details: Enter details for each variant, including option names (e.g., size, color) and values (e.g., small, medium, large).
Set Variant Specifics: Assign specific details like price, SKU, and inventory to each variant. This is crucial for effective inventory management and pricing strategy.
Step 4: Customizing Variant Images and Prices
Assign Images: Link specific images to each variant to clearly show customers what they are selecting.
Customize Prices: Adjust prices for certain variants if needed, especially for variants that cost more to produce.
Step 5: Organizing Variants for Display
Variant Display Order: Arrange the display order of variants on the product page for easy navigation.
Grouping Similar Variants: For products with numerous variants, group similar ones together for a cleaner and more intuitive display.
Step 6: Utilizing Advanced Options
For more complex needs, explore Shopify apps that enhance Shopify custom product options with features like conditional logic, bulk editing, and advanced inventory management.
Step 7: Testing and Publishing
Preview Your Product: Always preview the product page to ensure all variants are correctly displayed and the shopping experience is intuitive.
Publish Your Product: Once satisfied, save your changes and set the product to ‘Active’ to make it available to customers.
Conclusion
Effectively setting up product variants is key to maximizing the potential of Shopify advanced product options and Shopify custom product options. This process not only enhances your store’s functionality but also improves customer satisfaction by providing a seamless shopping experience.